Hey Everyone 🙂
How are you all? Today i am sharing a few photos I snapped way, way back, whilst making a project for a bit of fun.
I’ve recently been trying to actually edit lots of my old videos and get them uploaded to YouTube (well only if they aren’t too too bad lol) and thought i would do the same with old photos too. The only reason these things never got shared before is i run out of time everyday….. :/ Some of them are years old lol
Instructions:
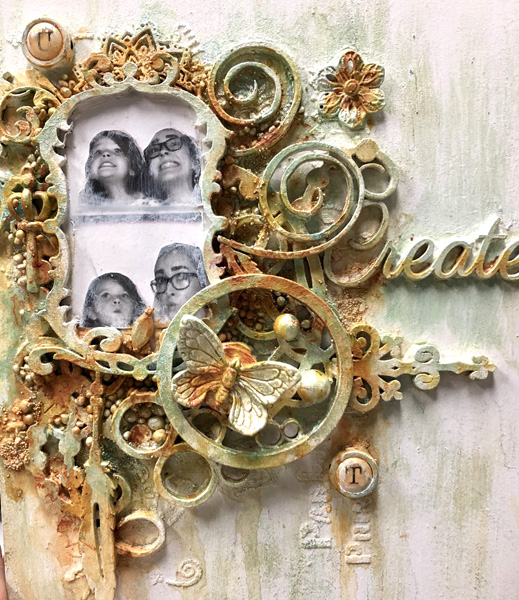
- I have used an MDF base for this piece, but a thick piece of cardboard or a canvas would do just as well. Firstly I painted it in white Gesso, you could also use white acrylic instead. Then using texture paste (I made my own, there are lots of recipes on the internet), I stencilled some wording onto the base. You could use any stencil that you felt fitted with the theme or ideas you were going with 🙂
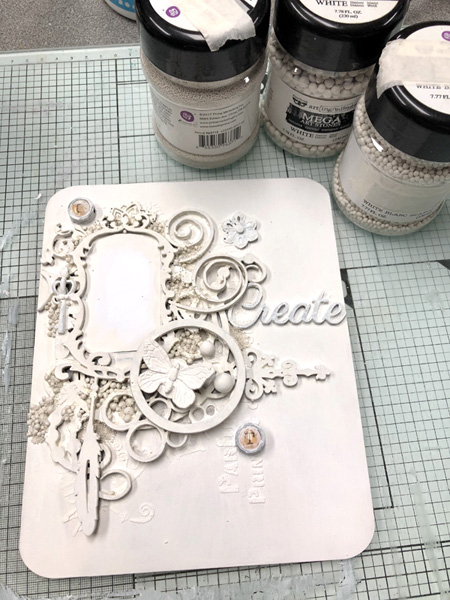
- I then used lots of different MDF embellishments and shapes to create a layout I was happy with. I also used a few metal embellishments and a photo of my two girls (they both look so young lol!) TIP: It was a coloured photo, but as I wanted to use a black and white photo, I scanned it into my computer and then re-printed it in black and white.
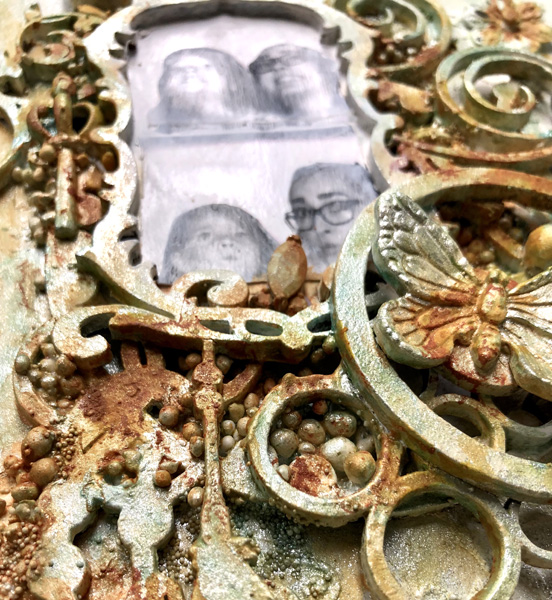
- Lots of the MDF shapes aren’t whole! For example the scroll hinge shape has been cut in half, the swirls to the right are from a bigger piece (Circle Flourish) but I just cut off some of the swirls as they were what i wanted for this piece. The fancy swirls to the left were one corner flourish cut to fit how i wanted them. The point is, don’t just use shapes and embellishments how they come, think of what pieces you could use as separates. The joy with this too, is it left me with lots of the leftovers for another project! I have added the links to some of the embellishments above, take a look and see how they started and this will give you an idea of just how much you can use from one piece. TIP: Once I was happy with my layout, I took a picture and no not just for this tutorial :p But so i could remember exactly where I wanted things, so i found it easier putting them back.

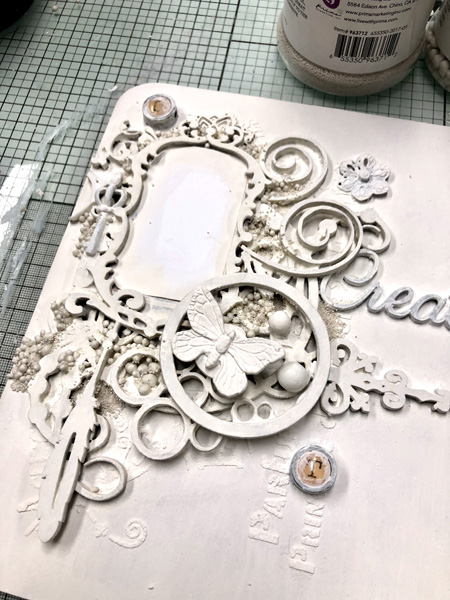
- Then I stuck everything down and covered it all in white Gesso. TIP: I covered the photo with a scrap piece of paper so that it didn’t get covered in paint where i didn’t want it! For the metal letters, I painted them but then wiped and in some places let the paint dry a little further and scraped it off, to give a partially covered look.
- Using a medium body Gel I added it in random places around the frame area and then added some art stones, I used the medium and small size from Finnabair, I think there are other companies that now do these, so shop around to get the best price.
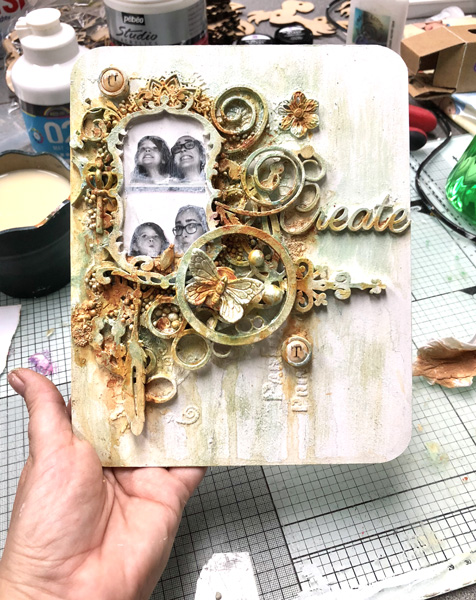
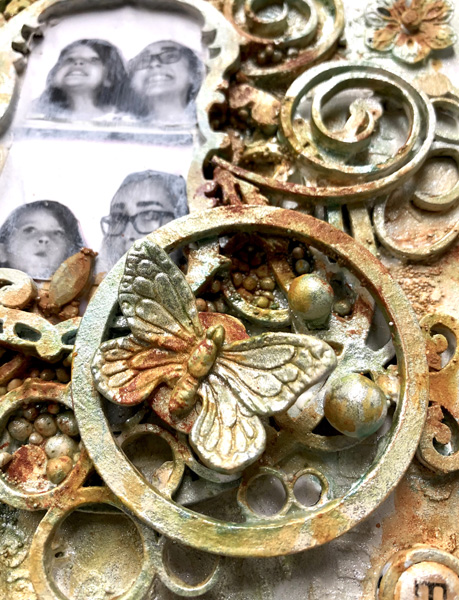
- Once everything was dry, I painted most of the embellished areas with Art Alchemy’s Sparks paint – Mermaid sparkle I spritzed with water whilst i was painting, to keep the areas a bit looser and help the paint flow into the gaps. This is quite a fluid paint so you don’t need much water, but if you were using a thicker paint you may want to use a little more water. By tipping the base when the paint was wet, helped create the streakier areas next to the embellishments and this also helps break up all of the white.
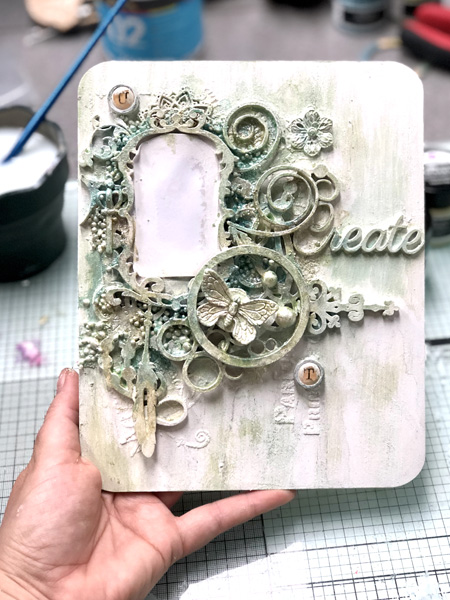
- I then used Prima Gold rust and red rust paints, these already have texture in them and so help to add that gritty grainy look to the project. TIP: If you don’t have these, you could use a bit of texture paste, mixed with similar coloured paints that you may have. I add them to random areas of the project, again using a little water to help the colours move and flow over different areas of the project. just keep going until you are happy 🙂
Here are a few close ups of the project, you can see I also added a bit of Gesso over the photo, this was because it ended up looking too stark against the colours of the finished project, so this just helps tone it down a bit and bring it back in line.
Hello All,
I posted yesterday on Facebook and since then I have been messaged by a few people asking what i would pick 3D printer wise. So i thought i would share this here and there incase anyone is interested.
These are my opinions only and i would 100% recommend anyone do their own research before purchasing a 3D printer. There are lots of other brands out there, Anycubic and Creality were two other brands i looked at, but for me Elegoo always seem to be slightly ahead or the same specs for less money and they have a great reputation in the industry.
If i couldn’t have got the Saturn, I would have gone for the Mars 2 pro, however the mars 2 is just as good if you want to save some pennies, the main differences between these two, are the pro has a very marginly bigger build area, has air filtration, has aluminum vat and knobs rather than plastic and a few more bits. None affect the quality of the models that come off though as both have the same light source/screen.
I would not go for the Mars (not linked) as the improvements between that and the 2 were quite a jump, including the much better mono screen and its all about the screen with these machines ? (well kinda lol)
I have linked the two mentioned below on Amazon as this is the best price i found, especially as a prime member and today being the last day of prime deals you get a chunk off, in fact with your savings you can get a bottle of resin for the printer and still have change from the normal price
Hope this helps (remember the prime member prices are only whilst prime day is on!)
Sam x
Mars 2 £200 – £152 if prime member https://amzn.to/3j1IcVp
Mars 2 pro £280 – £224 if prime member https://amzn.to/2STfono
This is the resin i have purchased to start me £34 for 1000ml – £27.20 if prime member https://amzn.to/3j3o8lE
Why not sign up for our newsletter?


